Share with others:
How to create a Windows 11 backup?

There are several ways. Some are already built into the operating system, others must be downloaded directly from the developer and paid for if necessary, and free trials are also available. First, we will explain how Windows 11 already allows us to create backups. We'll focus more on copying folders/files and programs rather than the settings themselves, which you can already back up using a Microsoft account, which means you'll have to say goodbye to your local profile.
Windows Backup
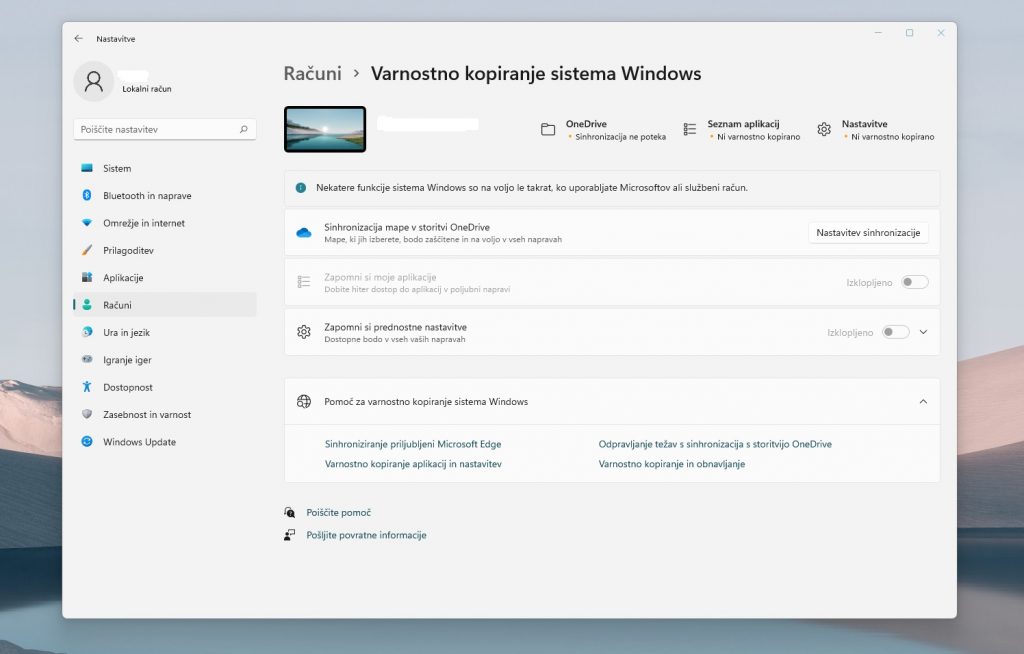
The first option is to use the cloud, which you only need to turn on in the settings and, of course, pay a subscription, unless you are already subscribed to one of the OneDrive packages. If you have a Microsoft 365 subscription, you will already have some space (1 TB) available for backup. In this way, you can create a copy of important files, programs, Windows settings, all accounts, saved Wi-Fi networks and passwords. Where to start?
- Go to the Start menu or click the Windows key on your keyboard. Type it Backup, which will direct you to the correct settings.
- If you already have a OneDrive profile connected, at the very bottom left you will see how much space you have available for backups. Otherwise, you must first rent a OneDrive package.
- You will have several categories at your disposal: folders, programs, settings, credentials... and for each you can choose what exactly you would like to back up.
- Press the button when you're ready Back it up (bottom right).
Another option with OneDrive is to use their desktop version, which will back up everything you have stored in your Pictures, Videos, Documents, Desktop, and similar folders. Copying can be automatic and is one of the easiest ways to copy important files once set up for the first time.
So:
- Install OneDrive, it is often installed by default on Windows 11 computers.
- Click on the OneDrive icon → Help → Settings → section Sync and backup → Manage backups
- Select what you want to copy and wait for the process to complete.
In the end, you will be able to access all the copied folders/files on all Windows 11 computers where you are connected with the same account.
These are two very easy ways to back up, but not many people are willing to pay for or trust the cloud.
External drives come to the rescue
The next solution requires the use of an external disk, preferably an SSD, unless you don't mind slower HDD speeds. In this way, you can select individual files and folders that you would like to copy, but not programs.
- To begin, connect the external drive to the computer.
- In the Start menu, search for Control panel.
- You will see a drop down menu in the upper right corner Show by, where you will select a filter Category
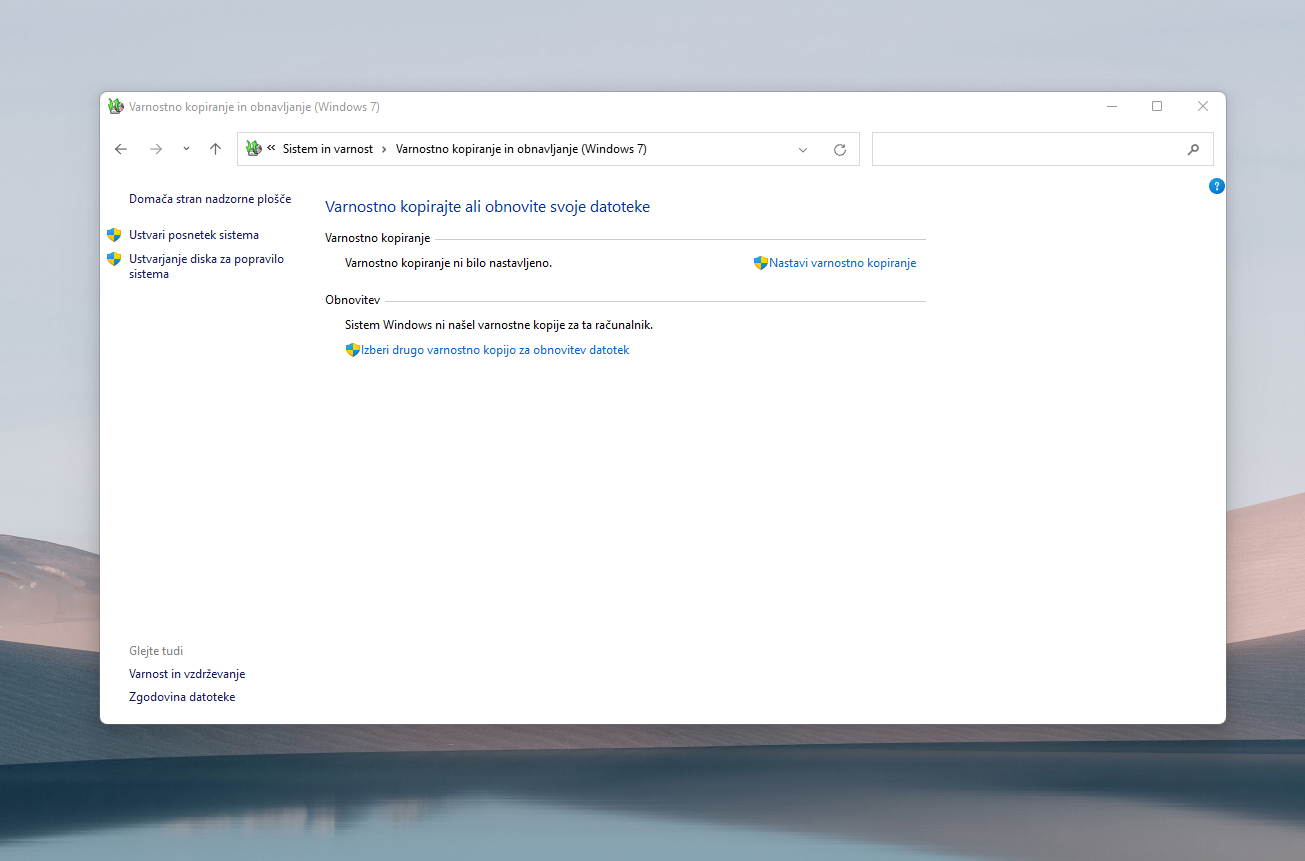
- Under category System and security select Backup and Restore (Windows 7). Now you may be aware that this backup method has been around for quite some time.
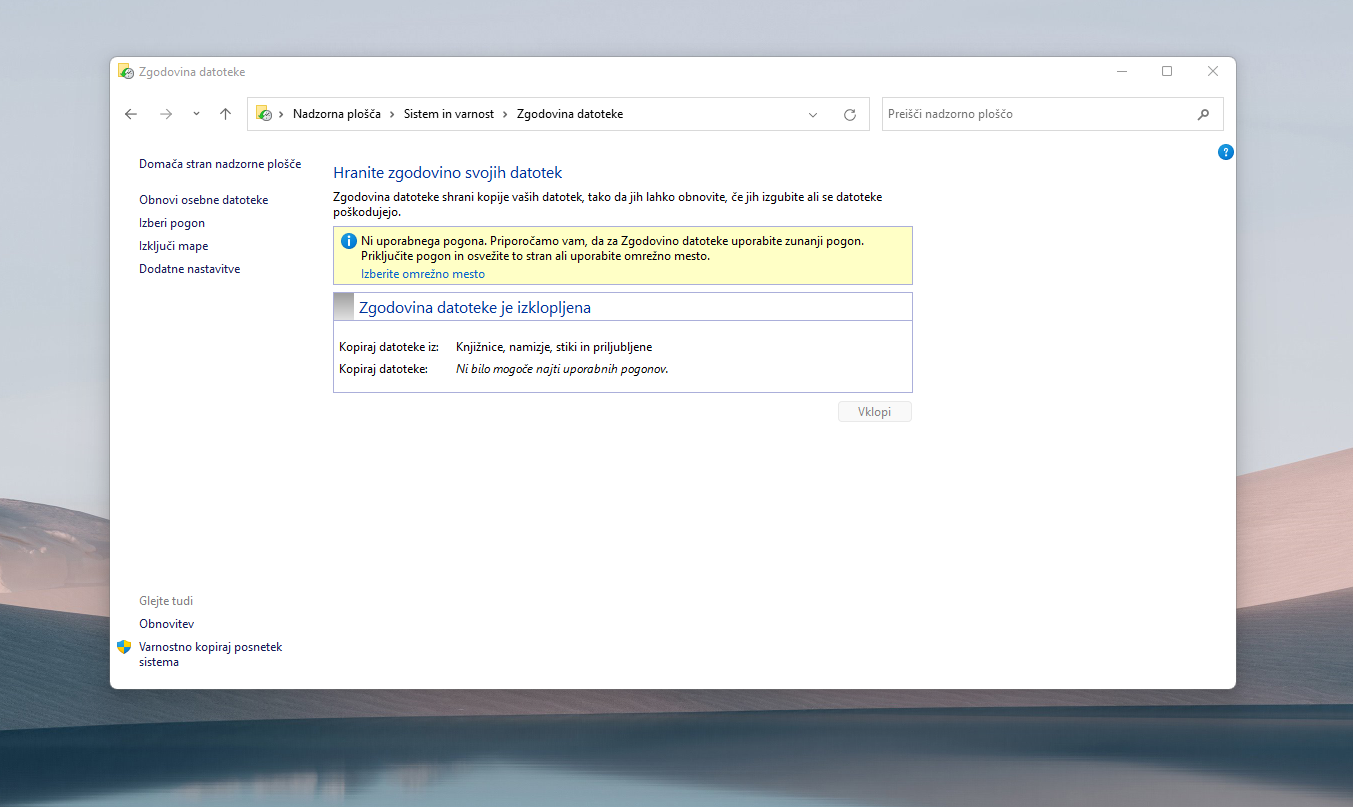
- At the very bottom left, click on File history.
- In a new window, you should see the external drive you want to use for backup.
- When you click on the button Turn it on, the selected folders and files will start to be backed up.
Even before that, you can exclude files and folders in the sidebar that you don't want to copy to the external drive. In the advanced settings, you can choose the backup frequency and how long the backups should remain in the archive of the external drive.
In this mode, you need to keep the external drive connected at all times if you want the backup to be done automatically and all the time.
Create a snapshot of Windows 11
A system image has also been around for many years and is still a very valid backup option. A system image creates a complete copy of Windows, which means that you will back up all the programs, settings, and files you have on your computer. Unfortunately, in the case of recovery, you cannot restore only individual files, but necessarily the entire system. Still, this is very useful in case you start up your computer and get a blue screen of death or some other serious problem that prevents you from using your computer.
You can save the created image to an external disk or any network location. You can also save it to a local drive, but if the drive fails, you will also lose the system snapshot.
- V Control panels again filter by categories and click on Backup and Restore (Windows 7).
- This time click on Create a snapshot of the system and choose where you want to save it.
But what if you want to restore the system from a snapshot?
- If you saved the recording on an external drive, connect it to the computer.
- If the computer is working and you can get to the desktop, go to Settings → System → Recovery → Advanced startup → Restart now
After restarting the computer, a window will appear where you will find the option to restore with a system image in the advanced settings. Follow the instructions on the screen and in a short time you will have all the data within your reach again.
What if you can't get to your desktop?
- Have the drive ready as if you were going to do a fresh install of Windows 11.
- You can use Rufus or Macrium Reflect to help, and you can get the Windows installation file directly from the official Microsoft website.
- Instead of installing Windows 11, choose Repair your computer.
- Click on Troubleshooting and then System snapshot recovery (System Image Recovery).
- Select the external drive where you saved the system snapshot and then wait for the recovery to complete.
These are the backup methods that Windows 11 gives you by default. But there are tons of other programs out there, many of which offer much more detailed data backup and recovery.
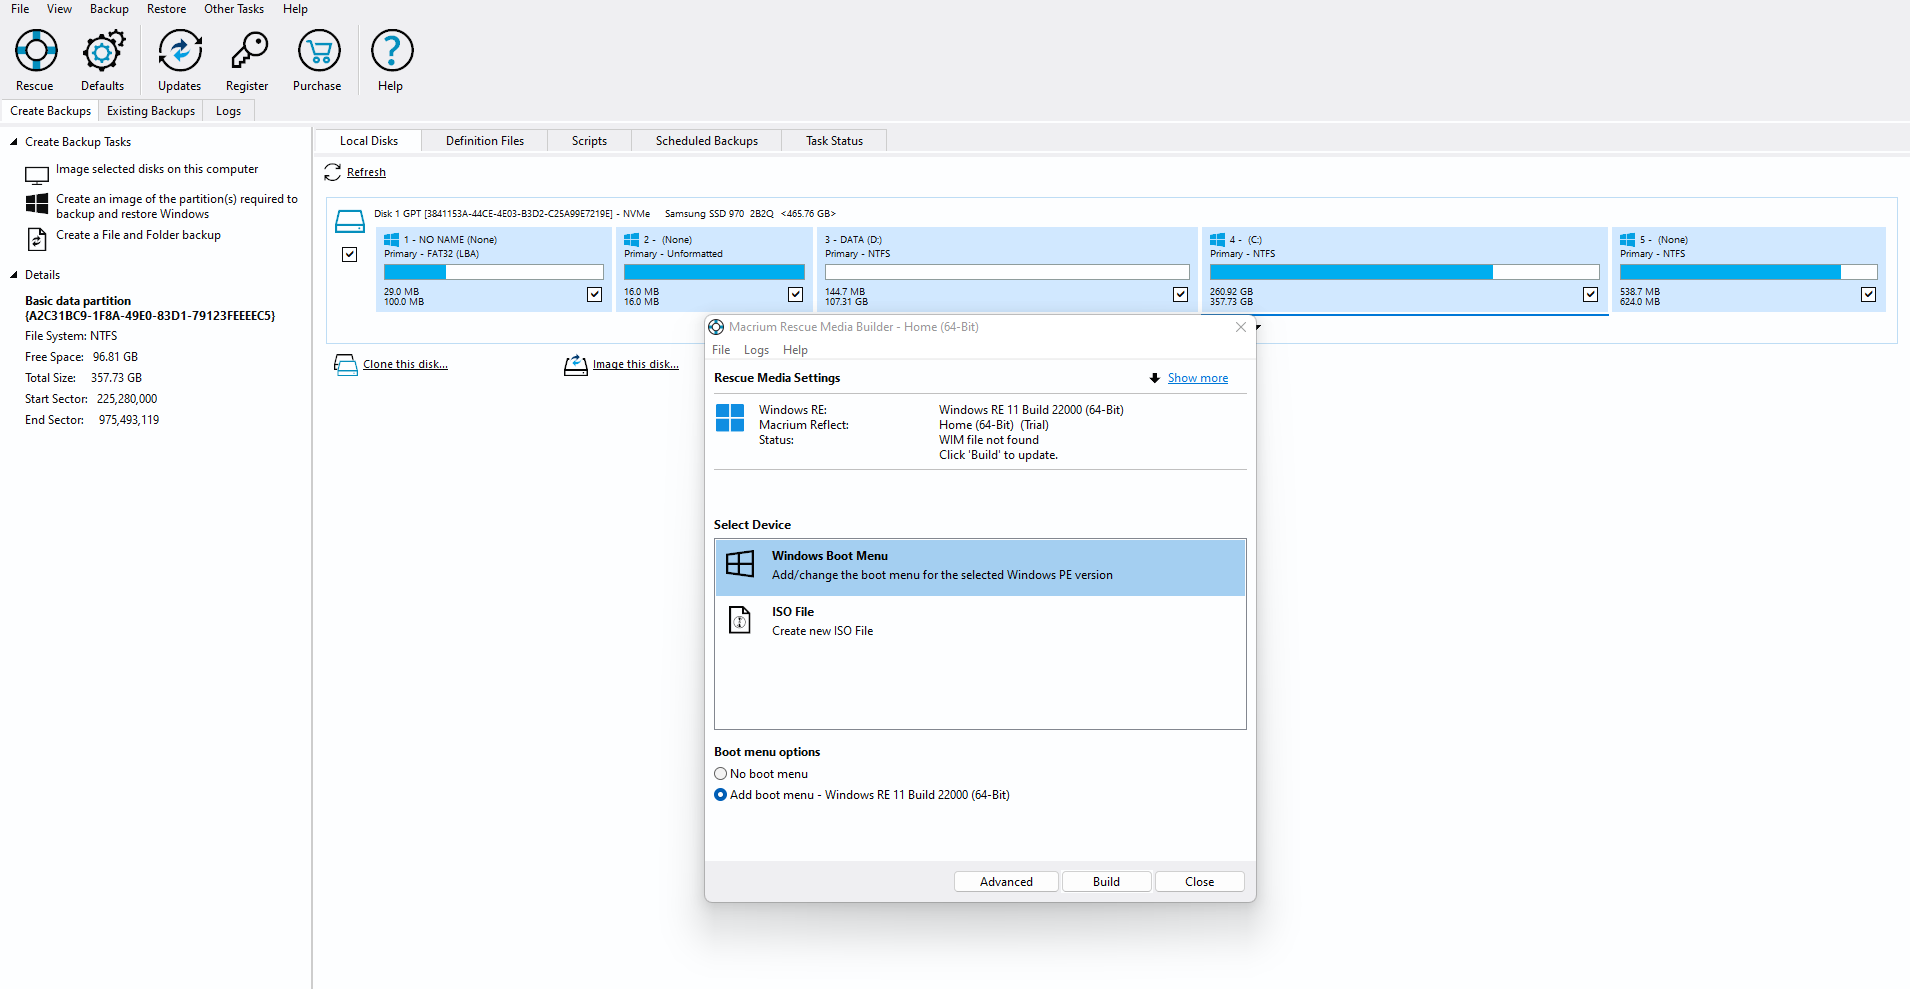
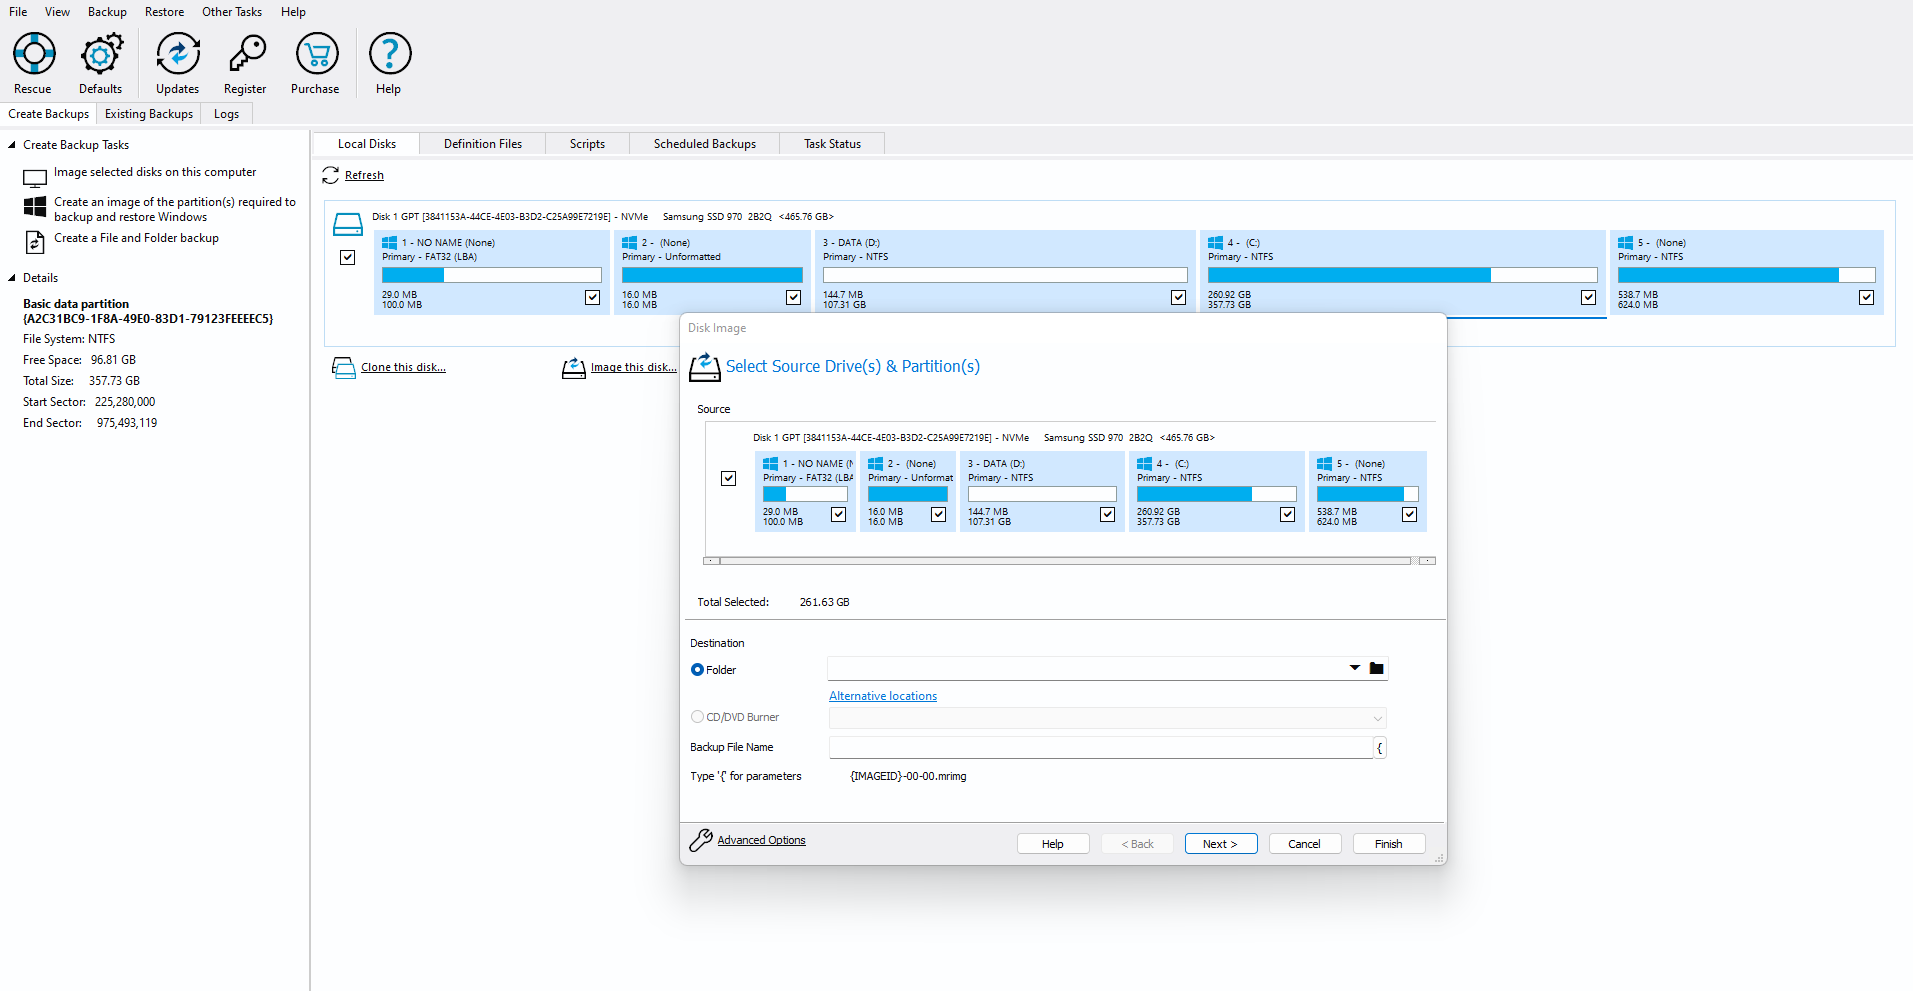
A popular choice is Macrium Reflect, which our editor also uses. Otherwise, there is a paid program (€42 per year), but a 30-day free trial is available for a taste, which is enough time to familiarize yourself with its features and see if the program is good enough for your needs.
Macrium Reflect allows us to create a rescue drive in case we fail to boot the system for some reason. Drive or Rescue Media we can upload to a USB key, change certain settings, for example whether we want BitLocker encryption and the like. If you've ever used Rufus to create an installation drive, then this process will be familiar to you. In case disaster strikes, you have a plan B you can rely on.
Even better functions are for creating backup copies of the entire Windows system or individual folders and files. You can, of course, create more of them, and store them on external drives or secondary disks if you wish, as long as you have enough space. We can also choose between differential and incremental backup.
Whether you choose OneDrive, backup to an external drive, Macrium Reflect or a similar solution, it doesn't even matter that much in the beginning. You will be better off than you are now, which is the purpose of this article. You may not have seen the need for a backup so far, but all it takes is one unfortunate event to happen and you'll lose all your data.